Municipal educational institution
"Secondary school No. 21"
Creative project on technology
"Pencil Girl"
Developed by a student of grade 8 "B"
Chelyakin Dmitry
Head of technology teacher
Khrabrov Nikolay Vasilievich
Vologda
Introduction to a creative project……………………………………………………….3
Justification of the project topic................................................................... ..….……………4
Historical reference................................................ ..................................4
Selecting a product option......................................................... ...............................5
Development of a product sketch……………………………………………………………8
Technological process of product manufacturing………………………..9
Calculation of the conditional cost of materials for the manufacture of a product…..10
Final control and evaluation of the project……………………………..11
Project protection……………………………………………………….12
List of used literature......................................................... .........13
Introduction to a creative project
Familiarity with a creative project is introduced into the technology of labor training from the 5th grade.
A-priory creative project- this is an independent research work that can be performed efficiently thanks to solid knowledge and skills of technology subject programs.
Goals and objectives of the creative project:
To develop polytechnic knowledge in the most common and promising technologies;
To form an idea of the basics of modern production and services;
Develop independence and the ability to solve creative and inventive problems;
To ensure the implementation of self-knowledge, familiarity with the world of professions;
To cultivate hard work, enterprise, collectivism, humanity, mercy, commitment, honesty, responsibility, and a culture of behavior;
Foster a caring attitude towards nature and natural resources;
Form an active life position;
Form the basic concepts of a market economy and the ability to apply them;
Develop a realistic plan to achieve your goal.
Equipment: samples of blanks, rulers, pencils, creative projects, reports, abstracts, posters.
Justification of the project topic
The object of the research work, creative project is the technology of manufacturing wood products, and the subject is the student’s own capabilities in this craft. The novelty and significance of the research can be defined as follows: “Everything new is well-forgotten old. Beauty, revived by human hands, can make the world warmer and kinder.”
The ability to work with wood is an opportunity to experience beauty. This skill is taught in wood processing technology lessons with a view to its further use for practical purposes. It is impossible to imagine Russian housing without wooden products, both in ancient times and in our time. Even in a modern apartment or office, a wooden composition will flash by, enlivening the interior of the room. Now many folk crafts are being revived, a lot of relevant literature is being published: books, magazines, manuals that will help in the design and manufacture of products.
All the tools in the workshop are distributed according to their arrangement, and only pencils and pens are, as a rule, chaotically lying on the teacher’s desk. You can correct this situation and restore order among your office supplies. The object of development of a creative project is the installation, which can be called a stand for pencils and pens, a pencil holder. Its use will help keep stationery on the table in perfect order, and this product can also act as a pleasant and useful gift for loved ones.
Historical reference
The history of the emergence of a stand for writing instruments should be considered in parallel with the emergence of the writing instruments themselves. The history of the pencil begins in the 11th century. Artists then drew mainly with sticks made from a mixture of lead and zinc, sometimes called “silver pencils.” Graphite pencils have been known since the 16th century. Buyers, mostly artists, squeezed these graphite sticks between pieces of wood or twigs, wrapped them in paper or tied them with string. The first document mentioning a wooden pencil dates back to 1683. In Germany, the production of graphite pencils began in Nuremberg. The modern pencil was invented in 1794 by the French scientist and inventor Nicolas Jacques Conte. Modern leads use polymers, which make it possible to achieve the desired combination of strength and elasticity, making it possible to produce very thin leads for mechanical pencils (up to 0.3 mm).
The usual hexagonal shape of the pencil body was proposed at the end of the 11th century. Count Lothar von Fabercastle, noticing that round pencils often rolled off old surfaces. 2/3 of the material that makes up a simple pencil goes to waste when it is sharpened. This prompted the American Alonso Cros, a pioneer of modern writing instruments, to create a metal pencil in 1869, where the rod is held by metal clamps (collets) - a collet pencil. This humble beginning influenced the development of a whole group of products that are used everywhere today.
The original item, a pencil holder, is an example of office interior items from the first half of the 19th century.
Selecting a Product Option
What specific requirements should the future product - a pencil holder - satisfy? The following criteria can be distinguished:
1. Durability.
2. Reliability.
3. Manufacturability.
4. Aesthetics (design).
5. Convenience.
6. Security.
7. Cost-effective.
8. Eco-friendly.
9. Personal attractiveness.
If you analyze various magazines, books, websites, looking at the options for the finished product, you will find a very large number of them, so making the final choice is not at all easy.
However, we will focus on four possible basic options, based on our taste. These options fully comply with the requirements for the product described above.


P 
stand for pencils and pens
Rice. 1. Possible product options
We will evaluate the selected product options in accordance with established criteria. We will proceed from a six-point scale for assessing the qualities of each option. We will present the results in the form of a table.
| Property/product variant | ||||
| Strength | ||||
| Reliability | ||||
| Manufacturability | ||||
| Aesthetics (design) | ||||
| Convenience | ||||
| Safety | ||||
| Economical | ||||
| Environmental friendliness | ||||
| Personal attractiveness | ||||
| Sum of points |
Analysis of the results obtained allows us to conclude that the most optimal is Option 3, which scored more points. Its main advantage is its original beautiful appearance (aesthetics). In addition, this option also implies variability: the shape of the product can be different (“hedgehog”, “fish”, “duck”, “ship”, “car”, etc.), which allows you to satisfy the aesthetic tastes of different people. So, let’s settle on the third option – the “Hedgehog” pencil holder.
Product sketch development
The pencil case consists of two main parts: the main element - the hedgehog and the base (stand), which are connected by a round spike (dowel).
Holes for stationery are drilled in the upper part of the case.

Rice. 2. Project product “Pencil”
Technological process of product manufacturing
| Sequence of work | Sketch, drawing | Tools, devices |
|
| Select a workpiece taking into account machining allowances (20x110x130), plan and sand all its sides Outline the template Make a series of cuts and use a chisel to make chips along the contour Process the workpiece along the contour (bring it to the line) Drill the required number of holes |
| Workbench, plane, sanding paper Blank, template, pencil Workbench, saw, chisel, mallet Files, sanding paper Drilling machine |


Calculation of the conditional cost of materials for the manufacture of a product
Having considered all aspects of manufacturing the “Pencil Holder” product, you can perform economic calculations.
The total volume of wood for the manufacture of pencil holder parts was V = 0.002 cubic meters. meter of wood.
1 cu. A meter of oak wood costs 6,000 rubles.
0.002 m3 x 6000 rub. = 12 rub.
When drilling on the machine for 20 minutes, the following electrical energy was consumed:
0.4 kW x 0.34 h = 0.136 kW x h
0.136 x 1.51 rub. = 0.21 rub.
Upon completion of assembly, the product is coated with furniture varnish. 0.05 kg consumed.
1 kg of furniture varnish costs 145 rubles.
0.05 x 145 = 7.25 rub.
The total cost of materials is:
12 + 0.21 + 7.25 = 19.46 rubles.
Final control and evaluation of the project
So, the product - a pencil holder - is completely ready and meets the developed criteria. The product is durable, reliable, economical, because... Not a lot of materials were spent on its production. The technology for making a pencil holder includes those operations that are mastered in technology lessons: planing, sawing, drilling, stripping, etc. Since these operations are not complex and labor-intensive, the production of a pencil holder required a short time range.
The product is environmentally friendly, as it is made from natural material – wood. Also, the pencil holder turned out to be very convenient and safe to use.
In office supply stores, you can check the prices for similar products and make sure that the cost of a home-made pencil holder is significantly lower. But, of course, we should not forget that the price of the finished product also includes the cost of wages to workers and transportation of goods to the store.
As a test and test, the product should be tested during a technology lesson. The pencil holder has been tested and found to be stable, comfortable, lightweight and useful.
Did you get the expected result? The initially planned product - a pencil holder - is ready, thanks to the knowledge and skills taught in wood processing technology lessons. Anyone can make a pencil holder with their own hands. In addition, by analyzing the calculations, we can draw a conclusion about how profitable it is to create on your own. The main thing is to believe in yourself, that everything will definitely work out. Neither a simple nor a complex thing can be done without love for your work, without a creative approach to business. And creativity begins with the desire to do something with your own hands. To do means to create. Creation, creation, is a way out of the ordinary course of life, rising one step higher, discovering new possibilities in oneself.
Project protection
Defense of a creative project includes a report that describes:
Justification for choosing the theme of the creative project “Pencil”;
Research of various product options and justification for choosing the best option;
Explanation of the sketch of the product parts and the manufacturing process;
Features of product manufacturing;
Calculation of the cost of materials for this product.
The finished product is presented to an expert commission for discussion and clarification of aspects of interest.
List of used literature
1) Yu.A. Zhadayev, A.V. Zhadaeva. Technology. Lesson plans for the section “wood processing technology” according to the V.D. program. Simonenko. 2006
2) Yu.E. Dolmatov, E.S. Golovanov. A manual for design work in the course “Technology for processing wood materials.”
3) A.M. Konovalenko. Fundamentals of carpentry., Kyiv, 1994.
4) L.N. Kreindlin. Carpentry work. 1978
5) M.B. Pavlov, J. Pitt, M.I. Guruvich, I.A. Sasova. Project method in technological education of schoolchildren: A manual for teachers. 2003
6) A.V. Khudyakov. Woodworking machinery. 1981
7) E.M. Muravyov, M.P. Molodtsov. Workshop in educational workshops. (Wood and plastic processing). 1987
8) A.T. Tishchenko, V.D. Simonenko. Technology. Industrial technologies. 2012
9) A.T. Tishchenko, N.V. Tit. Technology. Technical labor. 2010
The project method is the core of the entire Technology program, which makes it possible to qualitatively verify the level of students’ assimilation of educational material and contributes to their creative development. This is a method of developmental education that allows you to individualize the educational process and gives the child the opportunity to show independence in planning, organizing and controlling their activities. Therefore, the implementation of the project method in the educational process is relevant for our school. What attracts me to this method? The fact that it allows children to master the organization of practical activities along the entire design and technological chain - from the idea to its implementation. The proposed descriptive part of the creative project helped the student become a winner of the regional Olympiad.
Download:
Preview:
Municipal state educational institution
"Kopanischenskaya secondary school"
Liskinsky district, Voronezh region
TECHNOLOGY PROJECT
Performed:
Zhitnykh Daria Nikolaevna
Supervisor:
Sheresheva Alexandra Ilyinichna
Digging 2014
- Selection and justification of the project topic __________________3
- Collection of information________________________________________________4
- Scheme _____________________________________________________4
- Historical background_______________________________4-5
- Selecting options__________________________________________6
- Selection of materials and tools____________________6-7
- Product requirements______________________________7
- Economic assessment_______________________________7
- Environmental assessment_______________________________7
- Technological map_______________________________8-9
- Analysis of completed work________________________________9
- Advertising brochure_________________________________10
- References_______________________________________________10
- Appendix_____________________________________________11
SELECTION AND JUSTIFICATION OF THE PROJECT TOPIC
Recently, painting pictures using colored wool has become very popular. A painting made using this technique leaves a mark on the soul for a long time. They seem to immerse you in their world, giving you the opportunity to forget about everything and find yourself in a fairy tale. And this is so lacking in our fast and hectic times.
Wool paintings are a fascinating and unusual form of creativity. Even without drawing skills, you can create warm, gentle paintings and at the same time have a pleasant time working with natural materials. Every person who feels the need to create can do this.
The inspiration for creating future paintings is nature with its luxurious landscapes and diversity of the animal world.
What I like most is that there are no specific rules to this technique. Every time you “paint” a new picture, new subtleties in working with wool are developed. Such paintings give a special energy invested by the person himself. They serve as a harmonious decoration in the interior or simply as an original gift.
I am pleased to see how quickly and confidently wool is conquering the hearts of people and space in our lives. Handmade products are finally gaining popularity not only abroad, but also throughout Russia.
For some time I accumulated knowledge, inspiration and a firm belief that the time would come when I, too, would “draw something with wool.” And now it has come. I firmly decided: stop procrastinating, it’s time! I went straight to the handicraft store and bought wool in all sorts of colors, as well as needles for felting. My impulse resulted in a simple and cute “Kitten”.
So I determined Objective – try your hand at “painting with wool” and independently make a product that will be truly in demand.
Thus, the tasks decided on their own:
- develop a version of the future picture;
- organize a workplace;
- select the necessary materials and tools for work;
- make products using the wool painting technique;
- evaluate the quality of the completed product.
COLLECTION OF INFORMATION
Before starting to make the project, I had to work with needlework magazines, historical literature, books about wool felting, and consider several options paintings on the Internet. After working with these sources of information, I came up with several ideas for accomplishing my plans, which I combined into the following diagram. This scheme was a kind of algorithm for executing my project.
SCHEME
HISTORICAL REFERENCE
Wool – a unique natural material, used by humans for thousands of years for various needs. It is warm and flexible, soft and pleasant; wool not only warms, but also heals and decorates the interior. In addition, wool, like no other material, provides unlimited opportunities for realizing the most daring and fantastic projects.
The history of this unusual type of needlework goes back to the distant past. Felting is the oldest textile manufacturing technique on Earth. Archaeologists date the appearance of the first felted products to 8,000 years ago. Ancient people began to felt wool from wild and then domesticated animals. And only then did they learn to spin, knit and make fabrics.Felting wool can be done in several ways, differing significantly in technique.
1.
Dry felting (filting)- this is the compaction, knocking and tangling of wool fibers using special needles: the wool is repeatedly pierced with a needle until a homogeneous dense material is obtained. In this way, they create toys, jewelry, and decorative three-dimensional figures.
With a needle you can apply a design on felt or felt, using wool fibers instead of paints.
2. Wet felting (felting)It is performed using a soap solution that soaks the wool and, using mechanical action (friction), helps to flock the wool into a dense, homogeneous fiber. This method is used to make shoes, clothes,bags, toys, brooches, relief and three-dimensional interior items, panels and just canvases.
3. Nano felting (nuno-felt)- This is now popular felting with wool on fabric, which allows you to get very delicate and interesting in texture as a result. Wool, shrinking during felting, shrinks, dragging the fabric with it and compressing it. The result is beautiful folds and flounces, picturesque wrinkles.
Wool can be applied to any natural fabric, but best of all - to thin fabrics made from natural silk. Although experienced craftswomen use thin linen, cotton, viscose, even lace and guipure.
4. Mixed mediawidely used to create interesting textures and relief compositions. All types of felting can be found in one product, complementing each other.
5. Wool painting technique- this is also a mixed technique that allows you to create pictorial masterpieces using wool fibers instead of paints.
6. Felting in the washing machine.I think many people have encountered this method of felting when they threw a woolen item into the machine... I remember my surprise when I pulled out a “children’s sweater” from the washing machine, the color was very similar to my sweater. I was perplexed for a long time - where did he come from? It was only when I didn’t find my favorite sweater in my wardrobe that I realized the truth - having poorly sorted the clothes before washing, I quite accidentally discovered a new method of felting... However, I later learned that many craftswomen are keen on this method. Even special yarn is produced. The main condition is that the composition must contain at least 70-80% wool, or even better – all 100%.
SELECTION OF OPTIONS
Option 1 (Appendix No. 1). Bullfinches...Who doesn't know these wonderful birds! In the old days they noted: “If the bullfinch has arrived, then winter will come soon.” These are our winter guests, arriving in dark hats and with bright breasts, as if from a fairyland. The bullfinch is believed to bring wealth and happiness. And everyone who admires this bird for even a day will be happy and successful in love and business all year.
Option 2 (Appendix No. 2). The painting depicts a Russian countryside. Blessed silence. Don't you want to go there? Well, at least mentally?!
Option 3 (Appendix No. 3). A wonderful addition to the interior of any room in your home. Bright and expressive roses at any time of the year will remind you of gentle summer and the gentle sun, filling your home with comfort and warmth.
Option 4 (Appendix No. 4). “My affectionate and gentle beast” - this is the name that immediately appeared in my head when I saw this picture on one of the Internet pages.
The painting, which was easy to make, caught my attention. And since I am new to this type of needlework, this product suited me perfectly as a first trial work.
SELECTION OF MATERIAL AND TOOLS
Nowadays paintings can be made from almost any material. To complete this work, we chose a frame with glass from an old painting and wool for felting in different colors. I found the frame at home, and bought the wool at the store.
During my work I needed:
- frame with glass;
- wool of different colors;
- scissors;
- tweezers;
- cotton fabric;
- sketch of the painting.
PRODUCT REQUIREMENTS
I decided that my product should meet the following requirements:
- The product must be environmentally safe;
- The painting must be aesthetic and match the interior of the room;
- The product must have a low cost;
- The picture must be of high quality.
ECONOMIC ASSESSMENT
I started calculating the cost before manufacturing the product to make sure that the project was economically feasible.
ENVIRONMENTAL ASSESSMENT
The term “environmentally friendly product” includes, first of all, such a concept as the use of natural and high-quality materials that ensure the safety of others. This is very important, since the use of low-quality materials can cause various allergic reactions in humans and even cause various types of diseases.
My product is made from environmentally friendly materials. Wool, which is the main material in this craft, is a natural fiber of animal origin that does not cause any harm to human health.
Consequently, my product can be called environmentally friendly in all respects and can be recommended for use with full confidence.
TECHNOLOGICAL MANUFACTURING CHART OF THE PRODUCT
Work sequence | Graphic image | Materials and tools |
|
Selection of drawing | Drawing options |
||
Making a substrate for a picture | Cardboard from the painting, fabric, scissors |
||
Preparing the background - laying down the wool | Fabric, wool |
||
Laying out a drawing | Backing, wool, tweezers |
||
Covering the drawing with glass Trimming excess fur | The basis of the picture with a pattern, glass, scissors |
||
I frame the picture | Finished painting, frame |
After completing each type of work, I carried out self-control and complied with PTB.
ANALYSIS OF THE WORK COMPLETED
The product I made is one of medium complexity. In my opinion, the picture turned out to be of quite high quality, aesthetically pleasing, and most importantly inexpensive.
In the process of work, I became acquainted with the history of this type of needlework and learned that wool felting is an ancient technique, widespread in different countries. I got acquainted with many works on the social network.
“Wool painting” is quite an interesting activity, I was so carried away by it that this work gave me great pleasure and joy. Of course, there are small flaws, but they do not spoil the overall appearance. My mother, teacher and friends liked my picture. And it brought me a lot of positive emotions.
So, in the end, I was satisfied with my work.
The Prestige company is a godsend for true lovers of simplicity and grace. Wool products are cheap, but beautiful and high-quality acquisitions for your home. Handmade crafts are highly valued in our time: after all, they are what make our home different from others, filling it with comfort and warmth.
Buy products from Prestige!
BIBLIOGRAPHY
1. Felt. Filznadel. Wallow. Russian Doll House., M., 2008
2. Semyonova N.A. I will decorate my house myself: A manual for teachers. – M.: Education, 2006
3. Magazines on needlework.
4. Internet pages.
5. 3. Krasnikova G., Bublik V., Mamonova M.: All about felt and felting. Publisher: Press Distributor Agency, 2008.
6. Ksenia Shinkovskaya. Things made of felt., Publisher: AST-PRESS., 2008
Appendix No. 1
Appendix No. 2
Appendix No. 3
Appendix No. 4
STRUCTURE OF A CREATIVE PROJECT
Creative project– this is a complex work. The structure of a creative project includes the following components:
- explanatory note,
– creative work (product),
– protection of a creative project.
The design of an explanatory note is primarily subject to the same requirements as a printed work. The text must be written on a computer in Times New Roman font No. 14, line spacing - 1, page orientation portrait, page margins - left 2.5 cm, top, right, bottom 1.5 cm. The text part of the explanatory note is written in a single font and in black. Pages must be numbered. The work must have a content that must indicate the pages on which this or that section is located. Sections of the explanatory note are highlighted in bold. Colored inscriptions are allowed only in tables, diagrams and drawings. The explanatory note can be illustrated with photographs and drawings on the topic of the design work. It is necessary to pay attention to ensure that the work is not overloaded with photographic materials. In general, the volume of an explanatory note for a creative project should not exceed 10–15 pages of printed text.
The title page of the explanatory note must reflect the name of the educational institution, subject, topic of the project work, author and teacher. The topic of the project should reflect not only the title of the work, but also the technique of its implementation.
Municipal state educational institution
Secondary school No. __, _______
Creative project on technology
"Valentine's Day"
Completed by a student of ____class
_____________________
Head - consultant
technology teacher
_________________________
1. Justification of the problem and need that has arisen.
2. Scheme of thinking.
3. Identification of main parameters and limitations.
4. Theoretical information.
5. History and modernity.
6. Bank of ideas.
7. Sketch development of the basic version.
8. Product requirements.
9. Design specification.
10. Tools and equipment.
11. Materials.
12. Safety rules during work.
13. Manufacturing technology.
14. Quality control.
15. Ecological justification.
16. Economic justification.
18. Self-esteem.
19. Glossary of terms.
20. Literature.
Justification of the problem and need. This section provides a rationale for the chosen project topic and reflects answers to the following questions: why this topic was chosen, why it is interesting, what is its significance. In this section, special attention should be paid to the practical significance of the work being performed.
Scheme of thinking. The outline should include the main aspects of the project. When starting a project, a student may not yet have an idea of what kind of work he will be doing, but he should clearly know the sequence in which it will be organized.
Approximate scheme of thinking
Identification of main parameters and limitations. In this section, it is necessary to establish the basic requirements for the work being performed, that is, to determine the framework within which work on the project will take place.
Example. The product must meet the following requirements:
· The product must be made carefully.
· The product must correspond to the chosen style.
· The product must be beautiful.
· The product must be durable.
Theoretical information. This section outlines the theoretical foundations of the selected project topic, on the basis of which the product will be further developed.
History and modernity. This section provides historical background on the selected project topic. In addition, it is important to show the connection between history and the present of the issue.
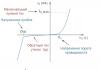
Bank of ideas. After collecting the necessary information, students put forward various creative ideas for making a particular product. Products can be combined by technique, style, and purpose. There must be at least three product options. Each of the options under consideration should have a brief description, which may include the name of the product, its purpose, and a description of the execution technique. Information can be presented either in text or in the form of a diagram or table. Making a decision to choose one or another proposed option can be done by using the “Decision Grid” marketing technology.
Conclusion : Based on the evaluation results, we can conclude: the most optimal option is option 2. The product is useful and multifunctional, with a universal style solution.
Sketch development of the basic version. The content of this section is a detailed description of the final version of the product selected for further production. Here it is necessary to have a detailed sketch of the product and its photo.
Product requirements. Requirements for the product give a clear idea of the main properties of the product being manufactured and are presented in a table according to the form.
Design specification. It is a diagram that clearly represents the main aspects of manufacturing a product.
Tools and equipment. This section provides a description of the tools and equipment used to manufacture the product using the selected technique, as well as the rationale for the selected tools for the product subsequently manufactured. Information can be presented either in text or in the form of a table or diagram.
Materials. This section provides a description of the materials used for manufacturing in the selected technique, as well as the rationale for the materials for the product to be manufactured in the future. Information can be presented either in text or in the form of a table or diagram. This section may also contain confection card, which provides samples of possible materials used.
Safety regulations. Sanitary and hygienic requirements. This section contains information about the rules for the safe performance of certain types of work. Theoretical material is presented to students in their own words and may be accompanied by illustrations.
Manufacturing technology. This section contains a technological map of the manufactured product. In this case, the technological map should be presented in the form of a table and contain the following columns:
In addition, information such as technical and technological conditions, safety precautions, etc. can be added.
Quality control. This section lists the requirements that the completed product ultimately meets.
Example. The finished product meets the following requirements:
· The color combination of materials is harmonious.
· All elements of the composition are made smoothly and accurately, in accordance with technology.
· The work is designed into a finished product.
· Overall, the product makes a favorable impression.
Ecological justification represents a justification for the environmental safety of the product being manufactured, the waste-free nature of its production, the possibility of recycling or the environmental safety of disposal.
Economic justification. The section is devoted to economic calculations of the cost and price of the product, as well as the size of the expected profit.
Example of section design:
Cost: C = C1 + C2 + Ao.
AO - depreciation (wear and tear) of equipment - 0.05% of the cost of the equipment.
Self-esteem. The importance of this section cannot be underestimated. At this stage, the student develops critical thinking, logic, the ability to analyze and draw conclusions.
Glossary of terms. In this list it is enough to include from three to five basic, most frequently used terms in the project. Of course, it is better if these terms are directly related to the main topic of the project.
Literature. When working on a project, various sources of information are used. Therefore, it is important to tell students about copyright and the conditions for using various sources of information, including the possibilities of the Internet.
An important part of a creative project is checklist. The checklist is compiled and filled out by the teacher. Its structure depends on the topic of the creative project. Important conditions for the teacher when preparing a checklist are the clarity and objectivity of the assessment, coverage of all stages of work on the project, and clarity of the assessment results.
The creative project is an independent final work on the subject “Technology and Labor Training”. It shows how strong the skills, knowledge and abilities of the student that he acquired in technology lessons are. In addition, a creative project allows the student to demonstrate individuality, as well as their own ability to use all acquired knowledge in practice.
In this section of our website you will find an abundance of creative technology projects, among which you will be sure to choose one that is interesting and accessible to you. With the help of the project, you can create new models using the material at hand. All presented projects are aimed at producing new competitive products that meet human needs and are also in demand among modern buyers.
What are the benefits of completing the project?
The implementation of projects presented on our website contributes to the development of:
- aesthetic taste;
- creative abilities;
- logical thinking in the field of project activities;
- logic.
Students will use the item obtained as a result of the completed project in practice, that is, use the product in their daily lives. In addition, students have the opportunity to independently evaluate the work done, as well as feel satisfaction from the result obtained through their own efforts.
How to choose a project?
When choosing, be guided by your own preferences and the availability of materials and tools necessary for the work.
In the economic part, it will be necessary to calculate the costs of the product. The technological part describes the production process. The presented projects are created in such detail that you will not have any problems during their implementation!
Slide 1
Author: Murnukova Svetlana Anatolyevna Place of work, position: MAOU interschool educational center of Kaliningrad, teacher of technology 1st category CREATIVE PROJECT 5th gradeSlide 2
 Lesson objectives: To introduce students to the concepts: “Creative project. Stages of project implementation. Preparatory stage"; Instill the skills of clear and correct expression of your thoughts, be able to analyze, highlight the main thing, and compare; promote memorization of basic terminology; To promote a caring attitude towards equipment and aesthetic qualities of the individual.
Slide 3

Slide 4
 Creativity comes from the word “to create” and means “to search, invent and create something that has not been encountered in past experience.” Creativity is the process of creating something new and beautiful, which fills life with joy, stimulates the need for knowledge, and enhances the work of thought.
Slide 5
 A creative project is an independent final work, as a result of which a useful product with novelty is created. For example, mastering new methods of processing or finishing a material, developing an original design or shape of a product, etc.
Slide 6
 The goal of any creative project is to transform the reality around a person.
Slide 7
 Stages and content of the project Stages Content 1 Preparatory Selection and justification of the project topic. Historical and technical information 2 Design Development of design documentation (drawings, models, sketches, diagrams, drawings, etc.) 3 Technological Development of technological documentation (technological map or product manufacturing plan) 4 Manufacturing of the product Organization of the workplace. Performing technological operations 5 Final Economic justification. Product brochure. Conclusions based on the results of the work. Project protection
Slide 8
 Work on the project can be carried out individually or collectively (2-3 people). This specifically defines what each student does. When designing a product, you can use ready-made parts and mechanisms.
Slide 9

Slide 10

Slide 11
 Requirements for choosing a project topic: the essence of the work to be done should be clear; the work should be interesting; you must be able to independently perform basic technological operations during the project; the material and technical base must ensure the implementation of the project.
Slide 12
 Historical information - a short study on the history of the design object. This certificate indicates: the time and place of origin of the design object (if any); the history of its development and application (local history material); features of manufacturing technology; traditions of production and use.
Slide 13

Slide 14
 The technical certificate indicates: tools and materials necessary for the manufacture of the design object; shape, color, size and other parameters of the product; traditions in decoration (in drawings, composition, technological techniques); a brief description of technological methods (symbols, diagrams, illustrations, drawings); types and methods of finishing products.
Slide 15
 Questions and tasks Define creativity. What is a creative project? What is the purpose of a creative project? List the main design stages. * The student completed a project - a “Chicken” panel made of three-layer plywood, and the quality of the work was excellent. The souvenir picture came out beautiful and everyone liked it. The student took the shape and design of the panel from a school textbook. The progress report was also submitted in a timely manner. While working, the student diligently completed all tasks, observed occupational safety precautions, correctly applied the acquired work techniques, and kept order in the workplace. Do you think his work is creative?
Slide 16
 Questions and tasks What does the preparatory stage include? What does the concept of “project justification” mean? Tell us about the content of the historical reference. What information must be included in the technical certificate? List the main sources of information. *What sources of information did you use to complete your project?
Slide 17
 NEW CONCEPTS Creativity, creative project, Design stages Preparatory stage, Justification of the project, Historical background, Information, Sources of information, Technical information.