Organizations often ask to embed a logo and a seal with a signature directly into the invoice for payment to the buyer. This makes the account look more solid and representative. Facsimile printing on an invoice is not prohibited by regulations and therefore many people take advantage of this opportunity.
Today I will tell you how to make a similar setup for 1C: Accounting 8.3 (edition 3.0) yourself, without the help of a programmer.
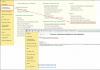
So, go to our organization’s card and open the “Logo and seal” item. There we find the “Logo” field and click on the button with the down arrow next to it:
From the drop-down list, select the “Show all” option:

In the selection window, click the “Create file” button:


Immediately after this we will be asked to indicate the picture that we want to use as our logo. You need to prepare a file with such a picture in advance (order it from the designer) or find something suitable on the Internet.
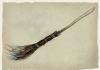
For our experiments, I took the 1C company logo:

In general, any image in formats (png, jpg, bmp) will do.
After selecting the file with the picture, indicate the name of this file in 1C and click the “Record and close” button:

As you can see, the file appeared in the list under the name we specified. Select it and press the "Select" button:

The logo was inserted into the field and displayed on the form, great!

Let's start making fax prints. To do this, click on the item “How to quickly and easily create a fax signature and seal?”:

Let's print and follow the instructions indicated on the printed sheet:

After that, we will have at our disposal a picture (scanned sheet) in one of the formats (png, jpg, bmp) with signatures and a seal already affixed, in my case it looks like this:

Click on the down arrow button next to the “Fax Print” field:

In the selection window, click the “Create file” button again:

In the file creation window, select the option “From a file on disk” and click the “Create” button:

We will again be asked to indicate the file with the picture; here we will select the same scanned sheet of paper with signatures and seal that we prepared a few steps earlier.
The settings window for the file will open. Specify the name and click the “Save and close” button:


We see that the picture with the seal and signatures was inserted into the “Facsimile Stamp” field and displayed on the form. Click the “Record and close” button in the organization card:

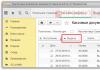
Finally, go to some invoice for payment to the buyer and click the “Print” -> “Invoice for payment (with stamp and signatures)” button:

A printed form of the invoice with a logo, seal and signatures has appeared:

If the image with the seal and signatures is too small, rescan the sheet with a higher resolution.
An invoice is an agreement in which the seller reflects the price for his work or services, and the buyer, by paying the amount in the invoice, accepts the seller's terms and references this invoice when paying. The current legislation does not regulate the form of the invoice for payment. Therefore, organizations can independently develop a payment invoice form suitable for their work. The most common and requested task among our clients is to add a logo, company seal and facsimile of an official to the printed invoice form. In this article we will tell you how to do this yourself using the example of 1C: Enterprise Accounting 3.0 without making changes to the standard printed form.
In order for the above details to be inserted by default into invoices for payment, you must perform the following steps:
1. From the “Main” menu, open the card of the organization you need.
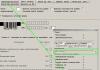
2. Open the “Logo and Printing” section and print the instructions.

Next, following the printed instructions, prepare drawings in any format (logo and scanned signatures and seals) and upload them into the appropriate fields: “Logo”, “Seal””, “Signature of the manager”, “Signature of the chief accountant”.

3. In the “Additional conditions for substitution in the invoice” field, you can specify the necessary information for the buyer, which will be displayed directly in the invoice (for example, standard conditions, etc.)

4. Using the “Preview” button you can evaluate the result of the actions performed.

5. To save the result, you must write down and close the organization card.
Attention! From a legal point of view, a document with a facsimile image of a seal is a copy. To prepare the original document, you need to print it without a facsimile and endorse it with a real seal.
Hello. I present to you my new 1C processing Invoice for Payment to the Buyer with Stamp and Signature.
Processing changes the standard printed form of the document "Invoice for payment to the buyer" in the Enterprise Accounting 2.0 configuration (1C:Enterprise 8.2).
Processing does not require changing the standard configuration, opening the configurator and editing layouts.
It does not affect further automatic updates from ITS disks.
Processing “Invoice for Payment to the Buyer with Stamp and Signature” is connected in 1C Enterprise mode and becomes available in the list for selecting printed forms of the document INVOICE FOR PAYMENT TO THE BUYER.
How to display a stamp and signature on an invoice for payment 1C
We open processing in 1C Enterprise mode. File - Open - "Invoice for Payment to Buyer with Stamp and Signature.epf"
We choose for the organization: Logo, Seal of the Organization and signatures of the head and Chief. Buh.
It is better to immediately add processing as external. Through the Service - Additional reports and processing - Additional external processing
After setting these settings, processing must be connect as an external printing form.
We go to the invoice for payment to the buyer and print our layout
This is what we get in the end
And here is a close-up of what the seal and signature on the invoice for payment to the buyer looks like in 1C Accounting.
So that you get the same effect as in my drawing, Pictures must have a transparent background!
This is simply necessary for electronic document management, so you need to make a transparent background on the scanned signature and seal drawings and save them in *.png or *.gif format
Processing works in the 1C Accounting 2.0 configuration, but can be easily modified to suit the customer’s needs.
You can make the following modifications in the printed form of the Invoice for payment to the buyer
Display additional information (As an example: Attention, the details of the organization have changed.);
display the contract and receivables;
additionally highlight invoice totals;
display advertising blocks;
The cost of processing is 1000 rubles or $33
You can pay to one of the wallets
Webmoney:
Rubles – R137603857842
Dollars – Z483614844528
Yandex account: 410011156200738
Download
After payment, send an email to [email protected] In the subject of the letter indicate “Payment for 1C Processing”, where you must indicate the payment account number.
The answer will follow within 24 hours.
For the creation of external printed forms, reports and 1C processing, please contact
Please ask all suggestions and questions regarding processing here in the comments.
How to add a stamp, signature and logo to the printed form of an invoice for payment to the buyer (for 1C: Accounting 8.3, edition 3.0)
2018-07-27T09:42:51+00:00Organizations often ask to embed a logo and a seal with a signature directly into the invoice for payment to the buyer. This makes the account look more solid and representative. Facsimile printing on an invoice is not prohibited by regulations and therefore many people take advantage of this opportunity.
Today I will tell you how to make a similar setup for 1C: Accounting 8.3 (edition 3.0) yourself, without the help of a programmer.
We customize the seal, signature and logo
So, go to the “Main” section and select the “Organizations” item:
Open the card of our organization and expand the “Logo and seal” item:

Immediately after this we will be asked to indicate the picture that we want to use as our logo. You need to prepare a file with such a picture in advance (order it from the designer) or find something suitable on the Internet.
For our experiments, I took the 1C company logo:
![]()
In general, any image in formats (png, jpg, bmp) will do.
The logo was inserted into the field and displayed on the form, great!

We will take care of the production of fax stamps and signatures. To do this, click on the item “Instructions “How to create a fax signature and seal””:

Let's print and follow the instructions indicated on the printed sheet:

After that, we will have at our disposal 3 pictures in one of the formats (png, jpg, bmp) with a seal and signatures, in my case they look like this:


We see that pictures with stamps and signatures have been substituted and displayed on the form. Click the “Record and close” button in the organization card:

Finally, go to some invoice for payment to the buyer and click the “Print” -> “Invoice for payment (with stamp and signatures)” button:

A printed form of the invoice with a logo, seal and signatures has appeared:

If the pictures with the seal and signatures are too small, rescan the sheet with a higher resolution.
We're great, that's all it seems
But what if we want the seal to fit over the signature?
Not everyone needs this, and apparently that’s why 1C by default made an option with a separate location for the signature and seal.
For those who need to combine them, instructions are below.
We combine the seal and signature of the manager
To do this, go to any account and create a regular printed form (without stamps and signatures):

It will turn out like this:

Then we cut off along the bold line at the bottom (before the signatures and seal) and scan the bottom part and save it as a picture on the desktop.
I got it like this (the stamp and signature are fictitious):
Again, go to the organization’s card, section “Logo and Printing”.
Here we delete the pictures with the signatures of the manager and accountant, and instead of the old seal picture, we upload the large picture we just made, combining the seal and signatures:

Click the “Record and close” button in the organization’s card, and then create a printed form of any invoice along with a seal and signatures:

In the printed form that opens, from the “More” item, select the “Change layout...” command:

In the layout that opens, go almost to the very bottom (about the 90th line) and select the invisible square below the inscription “manager”:

Our task is to drag this square a little higher (determined experimentally) than the inscription head and stretch it across the entire width of the printing form, like this:

Don't change anything else! Click the "Record and close" button, the printed invoice form will be reformatted automatically:

Exactly what we wanted happened - the seal climbed onto the signature.
Well done again
By the way, for new lessons...
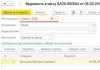
Change in BP version 3.0.64.34
Now, having set up a signature and seal in the organization, we still must select the “Invoice for payment” item in the invoice, and in the printed form itself, check the “Signature and seal” checkbox:

You only need to install it once. Its value is saved between calls to the print form.
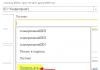
Addition from a site reader. If there was an invoice form - field
will not appear with a checkbox - it is necessary
1C configurations currently have a very convenient service for sending invoices for payment to customers directly from the program; for this you do not need to print a document or save it to external files, you just need to click the send button and specify the recipient’s email address. And what is especially important is the fact that the invoice can be generated immediately with a facsimile signature and seal, and you can also add your organization’s logo to it. In this article I will talk about how to set up such a convenient function in the 1C: Enterprise Accounting 8 program.
First of all, I want to show you what the finished result of our work should be. In the event that we want to generate an invoice with the manager’s signature and seal, after completing all the settings, the printed form of the document will look like this:
In order to load signature and seal information into the program, go to the "Main" tab and go to the "Organizations" directory

Open the desired organization and expand the fields of the “Logo and Printing” section. 
First of all, we click on the link “Instructions “How to create a facsimile signature and seal”. The program tells us that we need to print the proposed sheet, put signatures and a seal on it and scan it in the form of a drawing. After that, open the resulting drawing in a graphic editor (I used standard Paint), cut out the desired areas and save as separate files in png format.
Then we upload the resulting images into the program using the links “Upload stamp” and “Upload signature”. 
As you can see, the program also has the ability to upload the organization’s logo, which will also be displayed in the printed invoice form. 
Now you can open an account and try to print a new form. To do this, go to the "Sales" tab, select the "Invoices to customers" item, find the required document and click the "Print" button - "Invoice for payment (with stamp and signatures)". 
If we need to send an invoice by email, then click on the button with the image of an envelope located to the right of the print button. At the same time, the program will also ask what form we want to send 
We choose the option with a seal and signatures. If necessary, you can open and view the resulting invoice from the sending form. If all is well, all that remains is to indicate the recipient and click “Send”. 
If you have not previously sent invoices to customers directly from 1C, you must first configure your email account settings. To do this, go to the "Administration" tab and select the "Organizer" item. 
Then select "Email Accounts". We create a new entry, indicate your email address, password and sender’s name, and save the information. Now you can safely use this convenient functionality by sending invoices for payment to customers directly from 1C: Accounting. If you have any questions, you can ask them in the comments to the article.