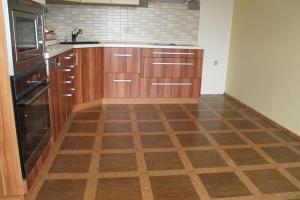
Self-leveling floors: a fabulous transformation of the interior

 When choosing a design for their home, many would like to create something original, unusual and at the same time practical to use. As a rule, the emphasis is on wallpaper, furniture, sometimes lighting, but the floor is often not given so much attention. But even from it you can make a real masterpiece. Screed floors are a prime example of this.
Characteristics of self-leveling floors
They are such floors, which is applied to the base.
The coating itself can be made of different materials, but the most common are:
- polyurethane;
- epoxy floors.
The difference is that epoxy floors are less elastic than polyurethane ones, therefore they have less resistance to shock and mechanical damage, and vibrations.
But epoxy floors are highly resistant to chemical irritants, which makes it possible to use them even in hospitals and educational institutions.
Advantages of self-leveling floors

The advantages of such floors are indeed many:
- Durability - due to the fact that the materials from which the self-leveling floors are made practically do not wear out, such a coating can serve for more than a dozen years. Especially if you follow all the rules for care.
- High fire safety - it is almost impossible to set them on fire, but even if they catch fire, they will not emit harmful toxic substances during combustion.
- This coating is not subject to the negative effects of fungi and bacteria.
- Due to the absence of seams, the described material does not collect dust, which will be especially useful for people with allergies.
- These coatings allow you to embody the most original design ideas in the interior. It is with the help of them that 3D images are made on the floor.

What do you need to apply self-leveling floors?

For work you will need:
- Colored polymer (or, if you plan to make a floor with a pattern, a special vinyl film with an image already applied).
- Vacuum cleaner (if you need to cover a large area, then an industrial one is more suitable than a household one).
- Self leveling polymer.
- Construction mixer (or drill with mixer attachment).
- Needle roller.
- Brush.
- Velor roller.
- Flat spatulas.
- Grinder (if it is necessary to process the concrete floor).
- Special shoes - the so-called krakostupy.
- Primer.
- Squeegee.
When everything you need is prepared, you can proceed directly to the work.

3D floor installation (video)
The technology of applying self-leveling floors
In order to make self-leveling ordinary or 3D floors in the apartment, you need to perform the following steps:
- The first step is to prepare the surface, i.e. straighten it out. Since a polymer coating is usually placed on concrete, another thin layer of concrete will be needed to level it. The new layer should dry well, and this will take an additional few days. To achieve a good result on the concrete floor, you can walk with a grinder. But the role for successful preparation is played not only by how even the surface will be - before starting work, the concrete floor will also need to be properly cleaned of dust with a vacuum cleaner.
- Next, a well-cleaned and dried surface must be primed. This is where you will need a mixture for a primer and a brush.
- After the primer dries, it will be possible to mix the dry polymer mixture with water. It is not necessary to dilute all the polymers at once - for now it is necessary to apply a leveling layer, so, accordingly, only a small amount of material needs to be diluted with water. It should be understood that such mixtures set quite quickly, so nothing needs to be done in advance. Mixing must be approached diligently: the success of the operation largely depends on how homogeneous the solution will be. The main thing is to act quickly, and do not forget to put on your feet before starting work.
- After the leveling layer has dried, in a sense, the creative part of the process will begin, namely, the installation of a film with a pattern. There is nothing complicated here - you just need to spread out the film and remove the wrinkles with a velor roller.
- A transparent polymer is applied over the decorative layer according to the already familiar principle. Everything here is the same as with the leveling layer: you need to quickly mix the elements, pour them on the floor, carefully distribute them with a doctor blade and remove the bubbles with a spiked roller.

In conclusion, we can say that self-leveling floors are a technology that allows you to make your own apartment unique. After all, you can choose any drawing, and not only a drawing - instead of applying a film, you can decorate the floor with special acrylic paints, and then apply the finishing layer. In a word, you can translate into reality any idea that your own imagination suggests.


