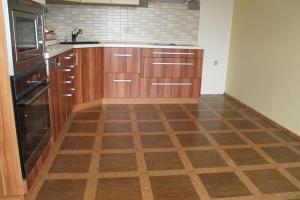
Modern repair technologies make it possible to create the most comfortable conditions in any living space. With one of these technologies - the installation of a warm infrared floor - let's get acquainted in more detail.
Such a floor can be laid under parquet, tile or laminate. And you can do it yourself. To work, you will need the following tools and materials:
- Complete set of infrared floor.
- Temperature controller.
- Winding of wires.
- Heat reflective material that is not electrically conductive.
- Soldering iron.
- Pliers.
- Sharp knife.
Laying technology
The technology of laying the infrared floor consists of several stages.
Stage number 1 - preparation of the base
Before laying mats, the floor must be cleaned of old finishes, repaired and carefully leveled. There should not be large irregularities - only a height difference of up to 3 mm per 1 square meter is acceptable.
Stage number 2 - thermal insulation of the floor
An extremely important point is the laying of heat-insulating material. This will prevent heat loss and reduce electricity costs. It is very important to choose a heater with a foil surface. However, it should not be an electrical conductor.
The material is laid with the foil side up and the individual parts are connected with adhesive tape so that they do not move apart.
Stage number 3 - laying the heating surface
Laying mats should take into account some of the nuances:
- The infrared film is not placed on the entire surface, but only in its open areas, where there will be no large-sized furniture.
- Indents from the walls should be at least 10 centimeters.
- Mats must not be overlapped.
- To reduce the length of the wiring, the mats are oriented in the direction of the largest room size.
- After mounting the film, it is necessary to cut off its parts that do not have a graphite layer. If this is not possible, such areas are simply sealed with insulating tape.
Stage number 4 - connecting the film

If in doubt, it is better to call a specialist for help.
Install the thermostat first. The place for its installation is chosen with great care. It should be located next to the wiring, and one device serves 15 square meters of area.
There are two options for installing a thermostat:
- Outer.
- Interior.
The first option involves mounting a plastic case on the wall. The second one is shattering. A recess is made in the wall into which a small device is inserted.
The fixed wires are fastened with pliers and laid parallel to the heating mat. The next operation is the placement of the copper clips on the strands of the film. The entire structure is tightly connected, and the ends are insulated with silicone sealant.
Now you need to make sure that the circuit assembled and connected to electricity is working. To do this, the thermostat is activated, and after a few minutes all parts of the film should warm up well. If everything works, once again check the places where the wires are attached, after which grounding is carried out with foil tape.
Stage number 5 - installation of a protective layer
After the installation of the infrared floor is completed, it is necessary to protect it from the finishing floor covering. For these purposes, polyethylene foam is the best suited. It is laid over the entire surface of the film, and plywood is installed on top of it. And only after that proceed to laying the laminate.
Note! When laying the laminate, care must be taken not to damage the protective layer of the film.
Basic safety rules for work
There are strict restrictions that you need to get acquainted with in advance to everyone who first undertakes the independent installation of an infrared warm floor.

Exposed wire insulation
Remember:
- It should not be placed in a room with a constant high level of humidity.
- It is impossible to carry out installation at a temperature in the room below 0 degrees.
- Do not bend the infrared mat at an angle of 90 degrees.
- It is forbidden to put heavy furniture that does not have ventilation pockets on the warm floor.
- It is forbidden to fasten the film to a solid base using nails, metal screws or self-tapping screws.
- Do not make any holes in the film yourself.
- It is not allowed to install such a floor without grounding.
- Experts prohibit installing one section of the film more than 15 meters in length.
- It is impossible to place an infrared warm floor next to other heating devices - installation is prohibited near a fireplace or gas stove.
Generalization on the topic
You can install an infrared floor in any dry room. If the installation is done correctly, the system will last a very long time. This option is the most economical way of heating among electric counterparts. Even those who do not have a professional education can work with infrared film. The use of heat-reflecting materials and a thermostat provides great energy savings.


