Not every person decides to hang beautiful paintings in their own kitchen. And this despite the fact that designers highly recommend decorating the kitchen with your own hands. After all, they will be able to bring something new and unusual to this room. DIY kitchen paintings are considered a new trend in transforming rooms.
If you want to decorate your kitchen with paintings, then first of all you will need inspiration. But how to find it?
The search for new ideas for inspiration should be drawn from everywhere. Don’t discard even those that initially seem too simple and banal. They may end up being exactly what you need.
Also accumulate vivid impressions. Find some nice box and put in it all those interesting things that you hope to later decorate your kitchen with.
Realize your potential in new genres. To create something interesting, you need to try new ideas.
Coffee and seasonings for paintings for the kitchen
Making a canvas with your own hands is quite simple. For this you only need certain tools and materials:
- various cereals;
- cardboard;
- glue;
- beans;
- Bay leaf;
- coffee beans;
- thick fabric;
- cinnamon bark.


Making canvas for a painting
First you need to prepare the cardboard. You will need to cut a rectangle or square from it. It depends on how you want the picture to look.
After this, the resulting blank is traced over the fabric, an allowance of five centimeters is made and cut out.
Next, you need to place cardboard on the fabric, cut off the corners of the fabric and glue it to the cardboard. To prevent the fabric from unraveling, its corners will need to be glued with special care. You pull the burlap onto the cardboard very tightly with your own hands.

Drawing for a painting
If you did everything written above with your own hands, then you should have a canvas. Now you need to make a drawing by laying out coffee beans and cereals on the canvas. What the picture for the kitchen will be like depends solely on personal imagination. The material can be laid out either loosely or tightly.
After you have designed the pattern, you need to glue all the elements of the picture. You can use regular glue, but it’s best to find a silicone gun with your own hands, since with its help gluing occurs much faster.
At this point, the process of making this painting can be considered complete.
Paintings from cereals and seeds (video)
Crafts from cutlery for the kitchen
In this case we will not talk about standard paintings for kitchens, but more about the panel.
Paintings from buttons and plates
The more buttons, the much better. They will be the basis for the paintings. They will need to be sewn onto thick fabric. After that, they are inserted into the frame and glued with glue. Interesting plates are hung in the center and on the sides and painted with acrylic paints. The masterpiece is ready!
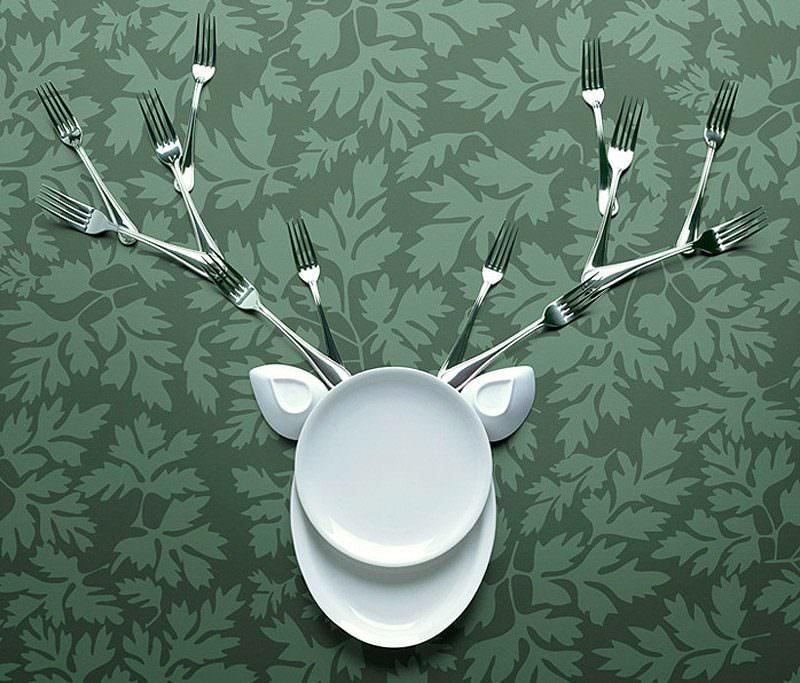
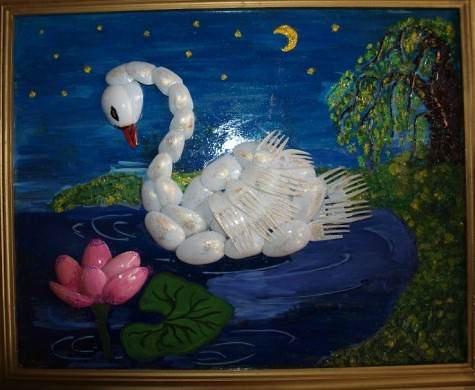
Paintings from spoons and forks
You can also sew forks and metal spoons onto thick fabric. They will need to be painted with enamel, after which you will get a wonderful still life.
Their plastic materials can make more interesting pictures in the kitchen. Plastic forks and spoons are easy to paint and can be glued to any surface.


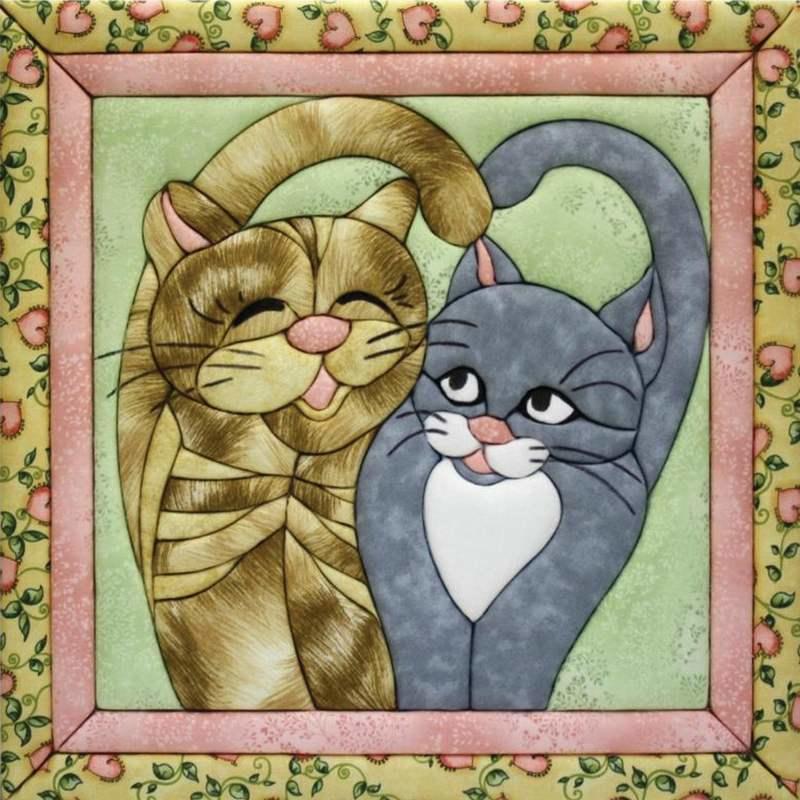
Cross-stitch
With the help of cross stitch you can create incredibly beautiful pictures for the kitchen. Such paintings are considered simply stunning decor for this room. All drawings and pictures can be made from:
- various products;
- colors;
- dishes.
You may not have paid attention to many items before. Now, thanks to the paintings, you will be able to feel all their beauty and charm. In order to make such a picture with your own hands, The following materials and tools are needed:
- fabric (canvas is best);
- two scissors (large and small);
- threads (preferably floss);
- marker for marking;
- special warmed needle;
- hoops (suitable in various shapes, sizes and from any materials).
All these materials are most often included in a general embroidery kit.
Available materials
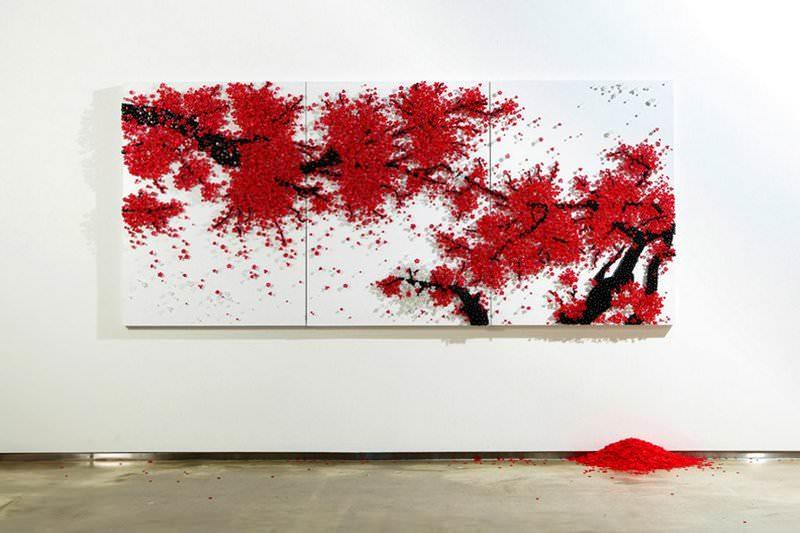
Mosaic
Mosaic opens up great scope for the implementation of creative ideas for the kitchen. You can make paintings in the form of a mosaic from the following materials:
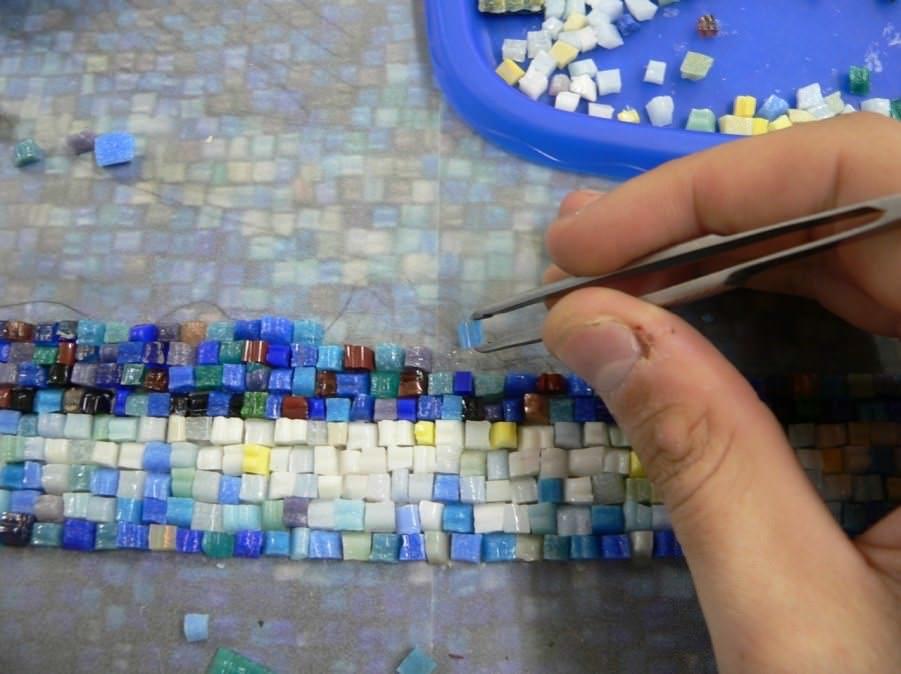
- glass;
- eggshells;
- broken tiles;
- rhinestone
Using the instructions below, you can easily do mosaic painting:
- cardboard of the required size is taken as a basis;
- glue is applied to it;
- put all the necessary elements on it;
- To fix small details, the product is coated with varnish.
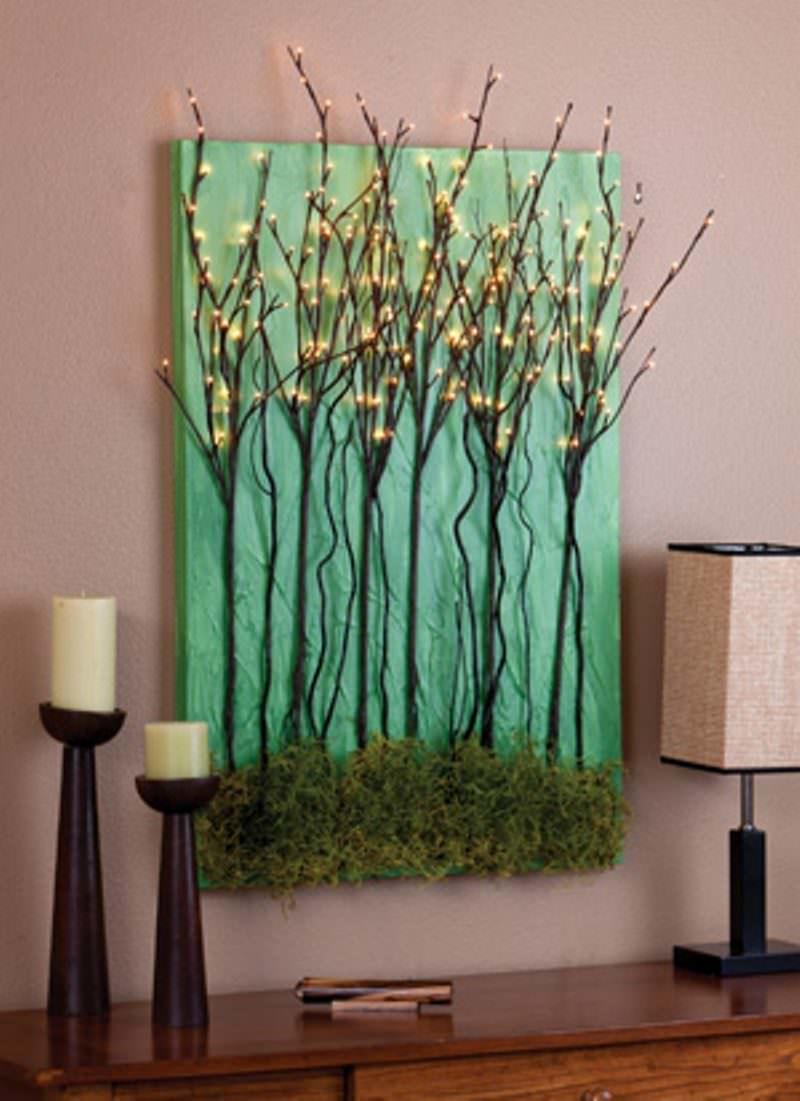
Installations
In making paintings with your own hands for the kitchen, you can use completely non-standard methods. The most incredible paintings are created using ordinary household items. For example, thanks to ordinary knives and other objects, you can create an incredible composition. Therefore for this you need materials such as:
- A4 photo frame;
- glue;
- ruler;
- pencil;
- scissors;
- cutlery in the form of a knife and other utensils;
- pieces of fabric.
DIY flower painting
The essence of this picture is to collect dried flowers. It's absolutely easy to make. Such flowers can be bought at any specialized store.
We take the base and glue the flowers with glue. Leaves and petals are drawn using pencils and felt-tip pens. If desired, you can even glue dried grass.

Leather painting for the kitchen
In this case, both suede and real leather are suitable. Its pieces are combined with paints, fabric and other materials. The most important thing is that with any such combination the picture will look amazing.
Paper painting
Unfortunately, this picture will not last long. But very beautiful. You can make both origami and quilling. Basically, such masterpieces are made by children, for whom the manufacturing process brings a lot of pleasure.
Paper painting (video)
Decorating with posters
Posters are large images that can convey someone's image or idea. Black and white posters are considered the ancestor of posters.
Exists several types of posters:
- depicted on canvas;
- printed on paper that imitates canvas;
- printed on photo paper
Making them for the kitchen is absolutely easy. All you have to do is find the image you need.

Foam painting for the kitchen
Many blocks of foam plastic remain after purchasing various household appliances. Many people throw it away, and do it completely in vain. After all, if you get creative, you can use it to make a kind of picture for the kitchen.
Initially, you will need to prepare some image. It will need to be glued to the surface of the foam. The sides of the block are also covered with paper of the desired color. To hang the resulting picture in the kitchen, all you need to do is attach a small loop to the back of it.
Master class on making a picture frame (video)
Conclusion
You read in this article about the main types of paintings that you can make with your own hands. As you may have noticed, there is nothing complicated in creating them. So feel free to start experimenting!
Paintings for the kitchen (photo)


A three-dimensional painting made of paper is often popularly called a 3D sculpture in a frame. There are a huge variety of techniques for creating such 3D paintings and panels - from papier-mâché from pieces of paper, to voluminous appliqués from colored paper, and what kind of landscapes can be made from toilet paper! And as soon as we started talking about 3D, it’s a very exciting activity: creating three-dimensional drawings on graph paper, from which anamorphic illusions are obtained. You can also make stunning multi-layered pictures from paper.
Cutting out large multi-layered paintings from plain paper - interesting hobby. If you decide to try your skills in this part of the art, start with simple paper paintings, the production of which will allow you to become familiar with the details of this type of craft.
We offer an easy and detailed master class, which will help you make a large picture cut out of paper with your own hands. This requires very little time, and the materials needed for the work can always be found at home.
 For work, we will need:
- Wooden frame.
- Paper blue, white, gold.
- Glitter in liquid form.
- Styrofoam.
- Wire.
- Stationery knife.
- Large tape.
- Glue, three different ones.
Process description
 Before creating the picture, we will treat the wooden frame with white paint. It is easier to use aerosol paints. Remember that the front part of our product there will be a back side of the frame. While the paint dries, you can move on to creating the background. To do this, cut out a rectangle from blue material. It must completely fit the internal dimensions of the frame.
On a white leaf, we will depict several trees with different intersecting branches. To make cutting easier, let's shade a couple of intersections with our pencil. Under the first leaf put a second sheet. Let's move on to cutting out the marked areas. After this, separate the leaves and trim the cuts with a knife.
Slowly fold the edges of both sheets to increase their volume. We will also tuck the tree trunks, creating small cuts and fixing them with our glue. This work is easier to do with an awl. Glue a couple of pieces of foam onto the bottom sheet, and then attach the second sheet to it. Space begins to appear between the paper snowdrifts, which gives the effect of layering and volume.
Now, using our stationery perforation knife, we make a couple of dozen round “snowflakes”. In the same way, cut out a couple of circles (circles) of different sizes from multi-colored paper. If we don’t have it, let’s start working with liquid glitter and make circles.
Let's cut out the moon from the material in the form of a circle and animal figures, from yellow we make stars.
On the third leaf of our white material, we depict a tall tree with thin and long branches, and slowly cut it out. When all the details are done, you can move on to assembling the “cut-outs,” as paper paintings are also called. To do this, you need to glue the layers of paper on top of each other one by one.
Our three-dimensional fake is done, it’s time to frame it. Measure the center at the top of the frame and screw the wire into the loop. Then we will pass a wire or rope through the loop so that the product can be hung on the wall. Glue a couple of strips of large tape inside the frame and place the picture evenly.
Craft completed! Now you can safely decorate your home with a paper painting you created yourself.
As you can see, with a little effort and patience, you can create unique paintings.
Gallery: paper paintings (25 photos)


3D paper painting, master class and diagram
 For making 3D paintings we will need the following materials and certain simple tools:
- A large frame or a nice box of chocolates.
- A special knife or knife for decoupage.
- A simple pencil.
- Sharp scissors.
- Leaf with print.
- A sheet of white specialty paper or small cardboard.
- Ruler.
- PVA glue.
- First stage. We start by making a blank from white special paper or thin cardboard, in accordance with the dimensions of the selected frame.
- Second phase. Separately, on a piece of strong paper, draw by hand or print using a printer a small heart, measuring four cm in height and five in width. We calmly cut out the sketch we have made along the contour and get the template needed for making a 3D painting from paper.
- Third stage. Next, the created template apply it to our paper blank and draw it in a row a couple of times horizontally and vertically. In the end we will have an image with nine identical hearts. You may get more or fewer hearts, it all depends on the size of the picture frame and the base, according to which we cut everything out.
- Fourth stage. Then taking stationery knife or decoupage knife, we create cuts on both sides of each heart made, leaving only the upper and lower middle of each image untouched.
- Fifth stage. After this, slowly bend both halves of each cut out heart to one side, so that it looks voluminous in appearance.
- Sixth stage. We will paste the created blank with large hearts onto scrap paper with a small print, so that it is visible through the holes made.
- Seventh stage. We insert the finished 3D paper painting into a frame and complete the work on its creation. In approximately the same way, you can make a picture from an accordion, the main thing in this work is that a person knows how to correctly assemble and cut out parts from paper.
Conclusion. Don’t be afraid to start making paper crafts; after simple products, you can start making paintings of flowers, and then you can also sell them.
Every resident of an apartment building dreams of diversifying their typical home with a standard layout with unusual decor that none of the neighbors will have.
One of these original ideas is voluminous sculptural compositions on the walls, which can be made independently from paper, fabric, putty, plaster and other materials.

Here are several practical master classes that will allow you to make a three-dimensional painting yourself, adding some zest to the interior.
Master class on making a simple 3D paper painting
An ordinary appliqué made of colored paper, transferred to the wall, becomes a whole original painting or panel, it can even be called a sculpture. Three-dimensional paper paintings are very easy to make, so with minimal creative skills you can create an unusual and unique composition yourself.

To make a 3D painting, you need the following tools and materials:
- a frame with high sides (you can replace it with an empty box of chocolates);
- paper knife;
- a simple pencil, ruler and scissors;
- scrapbooking paper with a design or pattern;
- a piece of coated paper or thin cardboard;
- PVA glue.

Operating procedure:
- The first thing you need to do is cut out a “canvas” from coated paper or cardboard on which the elements of the composition will be glued.
- Next, you need to draw a diagram of the arrangement of volumetric elements on the “canvas” with a simple pencil.
- On a separate piece of paper, draw a sketch of a three-dimensional element for the future painting, for example, a heart. Carefully cut out the resulting template. If you can’t draw beautifully by hand, you can use ready-made templates purchased in a store or printed on a printer.
- Attach the heart template to the prepared coated paper and trace along the outline with a pencil. Similarly, in accordance with a well-thought-out scheme, arrange a few more hearts.
- Using a paper knife, make cuts along the sides of the drawn hearts, bypassing the top and bottom middle, as shown in the photo.
- Carefully bend the two cut out halves of the heart towards each other to give it volume.
- Glue thin cardboard with cut-out volumetric elements on top of a sheet of scrapbooking paper so that the bright backing shows through.
- All that remains is to place the finished picture in a frame and hang it on the wall.
Using this technique, fluttering butterflies, blooming flowers, and a voluminous dress on a girl look very good.

Creating paintings on the wall using the technique of volumetric decoupage
Volumetric decoupage, or paperthol, is a special technique for creating three-dimensional images directly on the wall. It is quite simple to do, but still requires certain skills and accuracy. A practical master class will tell you how to make three-dimensional paper paintings with your own hands using the three-dimensional decoupage technique.

What you need for work:
- paper for paper - it must be thick and heavy;
- silicone glue;
- polymer clay;
- towel and paper napkins;
- polyurethane varnish;
- scissors, brushes, pencil or felt-tip pen;
- tweezers (for working with small details of the composition).

Execution order:
- First, outline the diagram of the future painting directly on the wall.
- Then cut out your chosen design from decoupage paper or napkin. A very wide workpiece can be divided into two or three parts for ease of gluing.
- The elements of the painting are first dipped in warm water and then blotted with a paper towel.
- On the wrong side, coat the workpiece or parts thereof with silicone decoupage glue, attach it to the wall and lightly press it with a paper towel. It is necessary to very carefully adjust the joints of the parts of the composition to each other, and also iron the image to avoid the formation of bubbles and remove excess glue.
- Next, we proceed to give our picture volume. Cut a copy of the blank glued to the wall into elements. Apply glue to one of the components of the picture, and attach a piece of quick-drying polymer clay to the wall in the place where it should be located, additionally spreading it with glue on top. The processed piece of the painting is lightly soaked in water, blotted with a towel, smeared with glue again and glued to the clay.
- After several hours, when the image is completely dry and the clay has hardened, the painting is varnished using a thin paint brush.

In this way, a variety of relief designs are created on the wall. In the photo you can see examples of work done using the volumetric decoupage technique.

Wall painting made from putty
To create three-dimensional paintings from putty on the wall, you need to have certain artistic skills, patience and a huge amount of time. This work is very painstaking. And yet, a three-dimensional painting made and designed with one’s own hands is worth putting such a large amount of work into it.

How exactly you will draw your picture depends on how large and complex the drawing or pattern will be, what application technique is used to create it. The master class will tell you the procedure.
Naturally developing as an art form, they have successfully reached the present day. At the same time, in modern designer interiors today it is almost impossible to find classical landscapes with still lifes: the place of pictorial classics has been taken by abstraction or highly artistic photography. It is with abstraction and modernism that interior painting is mainly associated, the task of which is to create a certain psychological background of the room, an appropriate mood for those present, as a rule, an atmosphere of peace and tranquility, or vice versa - office activity and energy.
The shift towards abstraction, it must be admitted, has brought painting much closer to the average person who is not involved in fine art professionally or at a technically high level. Naturally, not everyone is able to realistically reproduce reality on canvas; with abstract art, anyone has more opportunities to create their own mini-masterpieces. There are a variety of techniques, sometimes you don’t even need a brush: you can come up with an original way of applying paint to a surface yourself, you just need to practice and gain experience. 

The main condition for independently creating a picturesque interior element can be called the courage of ideas and determination in their implementation: when creating artistic abstraction, it is extremely important to free the mind from limiting cliches and, with a light heart and a steady hand, produce strokes, strokes, colored stains on paper, giving free rein to inspiration and imagination . If you succeed, the creative process will turn into a kind of meditation, giving rest to your head and nervous system, distracting you from everyday worries and disturbing thoughts. 


In principle, any flat surface, smooth or with a relief texture, can serve as a working surface for a painting. It would be quite logical to take the first steps on ordinary thick paper of the required size; cardboard and plywood are also suitable, which can be pre-painted in the required light (or vice versa, dark) shade.