Laying tiles in rooms and with external cladding should be completed with grouting of tile joints. We will tell you how to grout tiles, what materials to choose for this and what mistakes to avoid.
Why is grouting necessary?
Making tile joints is an obligatory final stage in laying tiles. It solves many problems:
tile grouting works like a sealant: it does not allow moisture to pass under the tile, prevents the appearance of fungus and mold in the joints;
seam processing helps to hide small differences in their width and other minor defects - chips, dents on the tile, etc.;
grouting tiles on the floor and walls fills the remaining voids in the seams. This ensures a longer service life of the tile coating;
grouting ceramic tiles- This is a decorative element that emphasizes the geometry of the tile and sets off its color.
How to choose grout for joints
The composition for sealing tile joints must meet a number of requirements:
Composition. According to their composition, grouts for ceramic tiles are divided into cement and epoxy. more convenient to use, affordable and versatile. Epoxies are quite expensive, require skill in their application, and can only be used for narrow joints.
Water resistance. This requirement must be met not only by grout for the bathroom. Most often, tiles are installed in rooms that are somehow exposed to moisture. Therefore, we always recommend choosing moisture-resistant grout for tile joints in the bathroom, pool, kitchen and hallway.
Resistance to external conditions. If you are looking for an outdoor grout, consider whether the mix you choose is frost and UV resistant.
Protective properties- antibacterial, antifungal. High-quality mixtures contain special additives that prevent the growth of bacteria.
If you prefer to choose only high-quality materials for your home or work, pay attention to the Sika brand (Switzerland). We guarantee the highest quality of Sika materials, their durability, ease of use and economical consumption.
For grouting, Sika offers SikaCeram® CleanGrout mixes . They consist of high quality cement, selected quartz sand and special additives. Once cured, SikaCeram® CleanGrout has sufficient water impermeability to make it suitable for pool and tank applications. The composition has high hardness and wear resistance, and fungicidal additives prevent the development of bacteria, mold and fungus.
SikaCeram® CleanGrout grout - universal composition:
it is suitable for tiles, marble, glass mosaic;
designed for outdoor and internal use and can be used even in the wettest rooms - for grouting in the bathroom and pool;
can be used for joints with a width of 1 to 8 mm;
has a rich palette of colors - 25 shades.
For additional waterproofing of tile joints in the corners of walls, joints between plumbing fixtures and walls, joints between parts of the mosaic, we additionally recommend using Sikasil-C silicone joint sealant. It does not contain acetic acid, that is, it is neutral and does not cause clouding of materials. Such a sealant can be used indoors and outdoors: at any operating temperature, it provides reliable sealing of joints.
What materials and tools will be needed?
For grouting tiles with your own hands, you need:
figured spatula for cleaning seams;
grout for tiles in the bathroom and other rooms. It must be diluted with water in the ratio indicated on the package to the consistency of thick sour cream;
rubber spatula for filling joints with grout;
a round rubber spatula or a piece of cable for smoothing seams;
water and a sponge for wetting the joints and washing off excess grout from the tiles.
How to prepare seams for grouting?
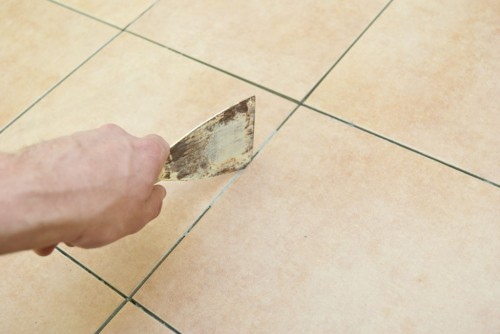
Before starting work, the seams must be thoroughly cleaned. This is especially true for grouting floor tiles: dirt, debris, sand begin to accumulate there immediately after laying the tiles. Foreign particles will impair the adhesion of the grout to, and in addition, spoil appearance seams.
It is convenient to clean the seams of excess tile adhesive with a sharp wooden stick. Be sure to remove the crosses installed between the tiles when laying. A vacuum cleaner is useful to clean the tile joints on the floor.
How to properly seal the seams?
Do-it-yourself grouting of tiles in the bathroom is usually done the next day after laying the tiles, when the cement adhesive sets.
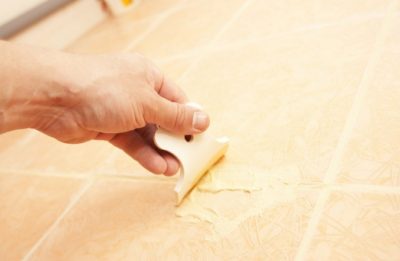
1. Dilute the grout according to the instructions. Lightly dampen the seams with a damp, wrung out sponge. There should not be too much moisture, but you can’t work on a dry surface either - this will worsen the adhesion of the grout to the seam.
2. Apply the grout with a rubber trowel, pressing the material into the joint. Move the trowel perpendicular to the seam, holding it at a 45 degree angle to the surface. Remove excess grout and apply again - but already along the seam. This will allow you to fill the seam with material as much as possible.
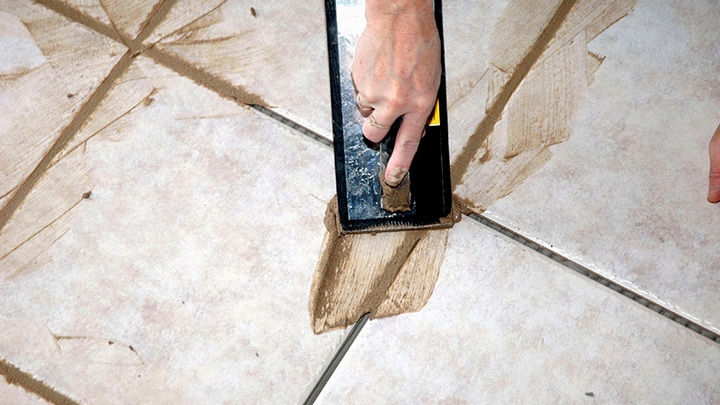
3. Smooth the seam with a rubber spatula (cable). When grouting floor tiles with your own hands, we advise you to make the seams even, level with the surface of the tile - so that dirt does not accumulate in them. With the help of a round spatula, the seams on the walls can be given a beautiful concave shape.
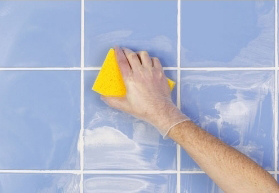
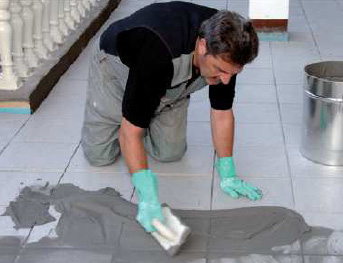
4. After 15-20 minutes, go over the seams with a damp sponge to level their surface. The sponge removes excess grout well and helps to form a beautiful even seam. It is important to choose the right time for this stage: the grout should remain plastic, but at the same time “grab” so that the material does not reach for the sponge. Constantly rinse and wring out the sponge from the remnants of the grout mixture.
At this stage, the adjustment of the joints can be completed, wait for the grout to dry and remove its traces from the tile. But for an even more aesthetic result, you can go further.
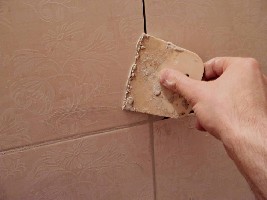
5. To remove bumps from dried seams, you need to wrap the spatula with fine sandpaper and gently run it along the seam. Try not to touch the tile with emery: it can scratch its surface.
6. When the grout “grabs” (you can check this by running a damp sponge along the seams - there should be no traces on it), the tile must be washed from the remnants of the material and wiped dry.
What mistakes should be avoided when grouting?
2. Cleaning seams do not leave excess moisture in them: This can cause cracking of the grout after it dries. Remove dirt with a dry brush.
3. Be careful with sharp tools and sandpaper: they can damage the glaze of the tile.
4. Before grouting unglazed tiles with colored compounds test it for pigment resistance. Apply a small amount of grout to unwanted tiles and leave for 2-3 hours, then rinse. If the tile has changed its shade, there is a risk of staining it when grouting the seams. In this case, the grout must be applied directly into the seam (for example, using a syringe).
It is worth taking a break - as a rule, one day, during which the glue will dry and it will be possible to start grouting.
What you need for a quality grout
Consider what tools and materials we need for this process:
For grouting

To stir the solution
For mixing

For the cleaning

For the cleaning
Preparing tiles for grouting
There is no need to prepare the tiles in any particular way. The main thing is to make sure that it is already dry. The seams can be cleaned a little. If there are traces of careless laying somewhere in the form of a dried mortar, you can lightly scrape them off with a screwdriver. Do not damage the edges of the tiles! After that, it is better to vacuum the seams and you can start grouting.
How to correctly calculate the grout consumption
(DP+ShP)*SHW*GSH*O/(DP*ShP)=kilogram per 1 square meter
where DP is the length of the tile (mm),
ShP - tile width (mm),
ШШ - joint width (mm),
GSH - depth of the seam (mm),
O - volumetric weight of the grout, approximately equal to 1.6.
Be sure to add 10-15% to the margin to the result.
Example: you have tiles 10*10cm, joint width - 2mm, depth - 6mm, we consider:
(100+100)*2*6*1.6/10000=3840/10000=0.384 kg/m2
To add 10%, multiply our result by 1.1:
0.384*1.1=0.422 kg/m2
And, of course, at the end you need to multiply 0.422 by the number of square meters of tiles.
Important! Often grout different manufacturers differ in consumption, so it is very difficult to calculate exactly. This formula gives only an approximate amount.
Preparing the mixture
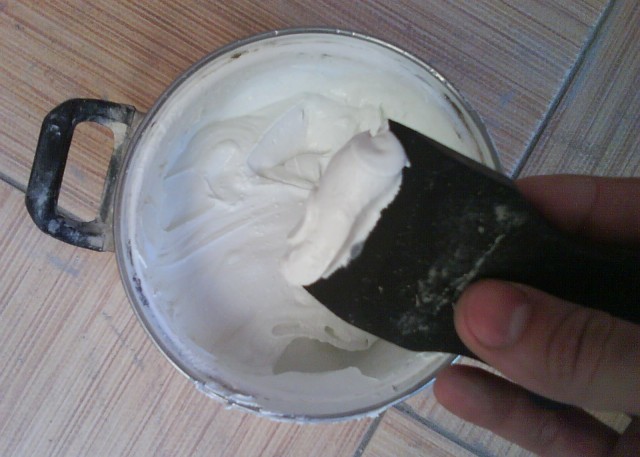
Before you start grouting, be sure to read the instructions that come with it. A properly diluted solution is a plastic, not very thick mass, just enough to make it convenient to work with.
The grout mixture should be mixed very carefully, we recommend using a construction mixer at low speeds to get a homogeneous mass. After that, cool water or latex is added to the mixture and left alone for 5-10 minutes. Now mix the solution again and it is ready to use.
Using a rubber spatula (in extreme cases, you can use the usual one, but it will be very inconvenient), we fill the seams, as if pressing the mixture inward. We collect the excess by running a spatula perpendicular to the seam and use it in the next section. If this is your first time dealing with grouting, then we advise you to practice in a small area of 1-1.5 square meters. m. before moving on to large areas.

To give the seam a concave shape, use the edge of the spatula (if it is rounded) or any handy object at hand will work. So some use the tip of a toothbrush handle, and some press through the seams with a piece of cable. This should be done when the grout dries a little.
Tile cleaning
With cleaning the tiles, it is better not to delay, or rather, proceed to it immediately after grouting is completed. You will need a sponge or washcloth and warm water. When cleaning, try to move at an angle or perpendicular to the seams. Wiping along the seam will likely damage your work, so be careful.
Video instruction for grouting
23-10-2014
- Preparation for grouting
- Grout preparation
Ceramic tiles as a finishing material is becoming increasingly popular. This is absolutely justified, because such decoration not only performs an aesthetic function in the design of the premises. The tile as a finishing material is distinguished by its special strength, durability, ease of maintenance, resistance to various household chemicals that are used for cleaning rooms and surfaces, and is resistant to moisture.

The simplest and cheapest grouting material is a mixture of cement and sand in a 1: 1 ratio.
Tiled finish will provide comfort in the room and for many years will save you from worries about repairs. You don't have to be a perfectionist to understand: the laid ceramic tiles acquire an aesthetically complete look only after high-quality grouting. It is this procedure that is the final stage of finishing the room with ceramic tiles. By rubbing the seams, you can hide the flaws in laying tiles, its small manufacturing flaws.
Preparation for grouting
So that the process of grouting joints between tiles does not cause irritation, and is not accompanied by unnecessary difficulties that can be easily avoided, you should clean the edge of the tile from excess glue even in the process, until the glue has hardened. Otherwise, you will have to remove excess glue with a sharp knife, going through all the seams cm by centimeter, and then wipe each tile space with a damp sponge to remove small particles of glue and dust. Thorough cleaning of the prepared surface is a necessary condition in order to obtain high-quality, even and durable seams after mashing.

The laid ceramic tile needs to be properly fixed before you start working on the seams, so you need to let it stand for about a week after installation. Then, without fear of breaking something, you can start grouting.
Let's prepare the necessary tools that will be used in the process of grouting ceramic tiles:
- metal spatula;
- rubber spatula;
- special spatula for seams;
- container for grout preparation;
- water container;
- hard sponge.
Back to index
Grout preparation
Grout for ceramic tiles can be purchased at any building hypermarket. It is better to do this together with the purchase of ceramic tiles in order to choose the right color.
In the manufacture of a mixture for processing joints, one should strictly follow the recommended proportions that are indicated by the manufacturer on the packaging of the dry mixture.
Failure to comply with the proportions can adversely affect the mashing process (if there is not enough liquid), as well as the strength of the grout (if there is an excess amount of liquid). As a rule, 300 ml of water is enough to prepare a grout for 1 kg of dry mixture - at this ratio, the prepared solution will have the consistency of thick sour cream. The mixture is quite plastic, it is easy to work with it - it easily fills the grooves between the tiles, so you do not have to make much effort. Well mixed in a special container, the mixture is ready for use.
Back to index
Grouting: sequence of actions
It should be remembered that unglazed tiles can be easily stained with colored grout. In order not to get colored streaks over the entire surface finished with unglazed ceramic tiles, it is necessary to test the tile for the ability to acquire (absorb) color before starting the seam processing. To do this, you can use the remnants (a piece of broken tiles) - apply a little grout to the front surface of the tile and leave for a while. Then clean the test piece of tile and compare its color with the surface prepared for finishing. If the tile is painted, then the grout will have to be applied very carefully only in the inter-tile space. For this purpose, it will be possible to use an impromptu device resembling a pastry bag: in a dense plastic bag, cut off one corner obliquely to form a small hole. Then fill the bag with the prepared mass and carefully squeeze it out through a small hole in the corner of the bag so that the mass is located directly in the seams.

For glazed ceramic tiles, such a test is not necessary, you can safely grout. We put a little grout on a rubber spatula with a metal spatula and carefully, with force, press the grout into the seam, passing along the longitudinal and transverse seams, paying particular attention to the corner joints. Remove excess grout with a rubber spatula, using them for the next section. A beginner should not apply grout over a large area - it is better to limit yourself to a plot of 1 m² in order to adapt to the material and tools, to have time to carry out further processing of the seams until the grout has set strongly. A diligent beginner can easily compete with a professional on the next such site.
At the end of applying the solution in the intervals between the tiles, after about 15 minutes, you can start processing the seams with a hard sponge: moisten the sponge in water, wring it out well and start washing the treated surface. First, you can walk the sponge over the entire area with diagonal movements, thus removing excess grout from the tile, rubbing it into the seams along the way, where it is still necessary. Then rinse the sponge again well in water and wring it out. Now the movements should be along the worn seams - longitudinal and transverse. To form a seam, you can use not only the plane of the sponge, but also its faces. Rinse your sponge frequently. A grouting time of 15 minutes is needed in order for the mixture to “set” sufficiently. This will prevent it from being washed away with a wet sponge.
After washing the seams on the tile, you need to walk over them with a special spatula designed to form a seam. This must be done carefully so that the worn seam retains its integrity, and deepenings and irregularities do not form on it. If the excess grout will be knocked out from under the spatula onto the tile, carefully remove it with a clean, wet sponge, moving along the joint. But if there is no special spatula (this tool is rarely found on sale), then the process of forming a seam can be completed by washing - even many professionals do just that.
Now there are no secrets left in the process of finishing seams. Having trained on a small area of the surface lined with ceramic tiles, you can move on to the next one.
When the entire surface is processed section by section, you can breathe a sigh of relief and evaluate the results of your work. With worn seams, the tiled finish looks fresher and more elegant.
The grout for ceramic tiles after finishing the processing of the seams should be left for 5-6 days, when it finally gets stronger. Then it will be possible to start cleaning and preparing the premises for operation.
Despite the apparent simplicity of the process, the grouting of ceramic tiles not only gives integrity to the visual perception of the laid ceramic surface, but is also able to level the flaws obtained when laying the tiles.
In addition, the joints filled with the mixture contribute to the moisture resistance of the tile and protect the surface from damage by mold and yeast fungi. That is why the main requirements for this specific mass are elasticity, hydrophobic characteristics and the presence of antifungal and antimicrobial additives in the composition.
Types of grout mixtures
If the work on grouting ceramic tiles is performed by specialists, then most likely their choice of material will be conscious. If you plan to do this work yourself, you need to carefully consider what kind of grout for ceramic tiles you need.
All mixtures for mashing can be divided into two large groups.
Cement-based mixtures are a powdered filler that is diluted with water or latex immediately before use. Mixtures containing Portland cement are more suitable for inexperienced workers, as they have significant plasticity, which makes it easy to fill even narrow seams and does not require special skills.
You can also purchase cement mixtures that are already diluted in industrial conditions. But, despite the convenience of working with such material, such grouting of ceramic tiles, the price of which is quite high, is not in proper demand among the population.
If you decide to mix the mixture yourself, you must carefully observe the proportions prescribed by the manufacturer. Otherwise, when dried, a too liquid mass may crack, giving the tile masonry an untidy look. In case of too thick a mass, the seams will not be completely filled, which will lead to a violation of the tightness of the tiled masonry.
Epoxy-based grout has high strength and adhesive characteristics and practically does not absorb water.
That is why it is designed for processing seams when finishing with ceramic tiles swimming pools, floors in public areas with high traffic and exterior facades of buildings. However, only specialists are able to work with this material due to its high viscosity. In addition, making seams with epoxy grout is a job that requires great care and scrupulousness, since it is quite difficult to remove excess applied material after hardening.
The ingredients of epoxy grout are the epoxy resin itself and a special hardener, which is packaged separately. Mixing of components is carried out immediately before finishing work, storage of the finished mass is not allowed.
Ceramic tile grout manufacturers
One of the largest manufacturers of a product line for grouting ceramic tiles is the German company Henkel, which produces a whole range of materials under the Ceresit brand. The products of this brand are of good quality, which is generally characteristic of German goods.

Grouting ceramic tiles ceresite does not absorb dirt, has frost and water resistance, which allows it to be used outdoors and in rooms with high humidity. These grouts are also used when tiling a warm floor.
An equally well-known manufacturer of all kinds of finishing mixtures, adhesives, sealants and all kinds of building chemicals is the Italian company Mapei. Mapei grout can be used on surfaces subject to deformation and allows the premises to be used already 24 hours after completion of work (or 48 hours for swimming pools).
Italian grout does not fade over time, and some product samples have acid-resistant properties. Thanks to the modified polymers in the composition, the seams filled with this material do not absorb, but repel water, which collects on the surface in drops, dissolving contaminants. Such nanotechnologies are called DropEffect.
Contrast or? Choosing a grout color for ceramic tiles
Grouting ceramic tiles, which you can buy in specialized stores, can be of various colors. When purchasing grout, you should consider:
- if the grout is of a dark shade, then each individual geometric
- a fragment of the tile will stand out in contrast, emphasizing the laying pattern. If you buy grout in lighter colors, then the entire tiled surface will visually merge into a monochrome surface. But with such a grout, it is possible to level the laying defects (different widths of the seams).
- white grout is impractical and gets dirty easily. In addition, white seams are no longer in fashion.
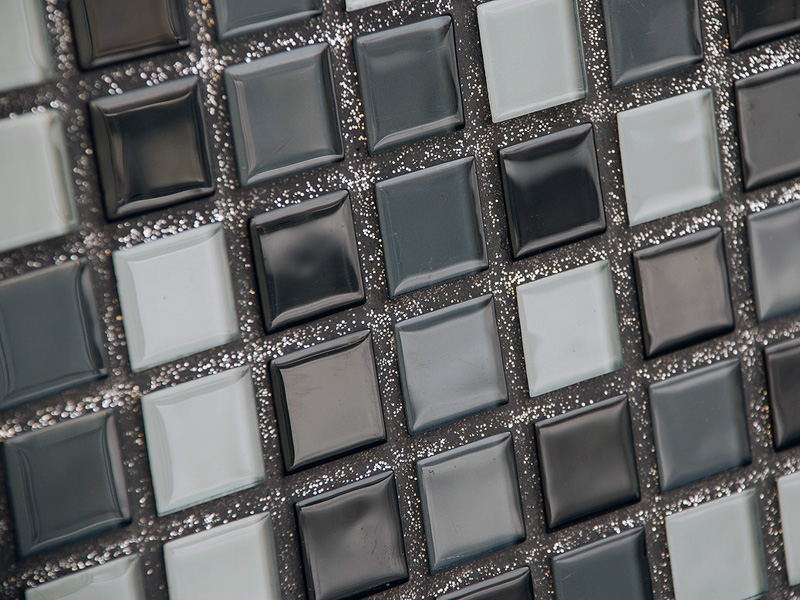
- if you want to finish mosaic tiles, it is best to choose a transparent grout, especially if the mosaic is glass or onyx.
Manufacturers can also offer you such a curiosity as grouting ceramic tiles in gold, mother-of-pearl or Night vision effect, which will give an unusual look to the tiled wall in your kitchen.
Before making a choice, apply a test small amount of grout to the tile, as after drying it may take on a slightly different shade, or brighten, depriving you of the intended effect.
Work technology
If you are planning to grout ceramic tiles for the first time, then in order to avoid typical mistakes of amateurs, it is best to get the necessary information by reading the material "Grouting ceramic tiles" video on the site:
All grouting work is carried out only after the tile adhesive has completely solidified (at least 2 days from the moment the tile laying work is completed).
The gaps between the individual fragments are cleaned from the remnants of glue and plastic crosses that limit the width of the seam. All debris and dust is collected with a vacuum cleaner, the tiles are wiped with a dry cloth. The grout mixture is diluted in small portions, as it quickly loses its plasticity. You can find information about the setting time on the packaging.
To fill the joints, you will have to purchase a rubber spatula of suitable width, triangular or rectangular shape. A very convenient professional tool that resembles a trowel with a large handle-bracket and a silicone or rubber base.
If the tiles are porous and there is concern that the grout will be absorbed into them, the grouting of ceramic tiles is made from a bag with a tip and resembles the jewelry work of a confectioner.
When filling the joints, do not leave voids that can lead to the formation of mold due to insufficient tightness. To avoid this trouble, rub the mass with pressure, literally pressing it into the space between the tiles.
After the joints are filled with the mixture, the tiles are allowed to stand until the mass is completely dry, after which all excess material is removed with a cloth.
Most often, tiles are used to finish floors in bathrooms and kitchens. The choice of color of ceramic tiles and images on it is very wide, so everyone can choose the most suitable option for themselves. Installation rules require leaving a gap between the tiles, the so-called seams. This is required in order to hide irregularities when laying with your own hands. Then the seams are processed with a special grout, which makes the lining more attractive. It is not difficult to do this work yourself, the main thing is to choose the right mixture.
What mixture to choose?
Choosing the right grout for your floor tiles will help you avoid problems during the surface finishing process. The main criteria are the color of the mixture, its purpose, composition and properties.
- Color. For many people, this item is of paramount importance, because from color solution depends on the appearance of the whole room. In order for the tiles on the floor to look like a monolith, the grout for the joints is selected to match the tone of the coating. Today, you don’t need to run around the shops and look for the paint of the right color, just add color to the white mixture. The most daring designers choose contrast.
- Appointment. For floor grouting standard mixture is not suitable. Since the load on the surface is intense, a more tenacious grout is required.
- Composition and properties. The composition of mixtures for processing joints may include Portland cement, alabaster, epoxy resins, gypsum, etc. The properties of the mixture depend on the composition. If it is necessary to grout the seams on the floor in the bathroom, in which the level of humidity is high, then epoxy compounds should be used, since they are moisture resistant and more durable.
 Grouts for tiles: dry and ready
 Among the varieties of grout mixtures, there are also:
- Cement-sand. Suitable for rooms with gentle conditions (moderate temperature and humidity), and the base is made of concrete or brick. Used for decorative stitching.
- Polymer. Made from silicone. Resistant to temperature changes. Suitable for rooms with a "warm floor" system, and are also used for seamless laying of porcelain stoneware or stone, followed by polishing.
- Polymer cement. Designed for rooms of the same type as cement-sand. However, their composition contains polymer components that make the composition more durable and moisture resistant.
- Epoxy-cement. Just like epoxy, they are used in the process of internal and external works. Due to their chemical properties, they are suitable for use in harsh operating conditions.
When choosing a grout for floor tiles, you need to consider, among other things, whether the mixture is compatible with the adhesive on which the flooring is mounted, and the width of the joints. As a rule, manufacturers of ceramic tiles and mixtures themselves give appropriate recommendations.
How to properly seal the seams?
Grout mixtures are available in dry and ready-made. The convenience of the powder is that you can use it as needed, and it is stored for a long time. However, when breeding, it is quite difficult to calculate the required amount of dry mix.
Ready grout is the most convenient option. It is an elastic mass packed in jars or buckets. However, an open container has a short shelf life. Therefore, if you decide to rub the seams with your own hands, it will be financially profitable to purchase dry mixes.
As a rule, it is possible to rub the seams a day after laying the tiles. Before you begin to process the gaps between the floor tiles, you will need the following tools:
- Water;
- Brush;
- Container for mixing the solution;
- Paint mixer or drill with a special nozzle;
- Trowel or small rubber spatula;
- Foam sponge or clean rag.

The grout mixture is kneaded in small portions, so in order to achieve its uniformity, you can get by with a spatula or trowel. If you need large volumes, you will need a mixer.
Before applying the grout, the tile must be cleaned of glue, dust and dirt. The seams are cleaned with a damp cloth, and right before processing they are moistened with a foam sponge to reduce the absorption of liquid from the grout. Also, experts advise treating the seams with an antifungal agent.
The next step is to dilute the powder (if a dry mix is \u200b\u200bused) according to the instructions on the package. It is important to remember that the grout must be plastic. If it turns out to be too liquid, the strength will decrease significantly. After mixing, the solution should stand for about 10 minutes, then it can be applied.
Work is being carried out from the far corner of the room to the door.
Grouting on ceramic tiles is carried out using a flexible spatula. For a more accurate application of the solution, you can use a pastry bag. The seam must be completely filled with the mixture so that there are no voids inside, the excess is removed. The borders of the grout must necessarily coincide with the surface of the tile. When the solution dries, it must be slightly moistened with water to prevent cracking. It should be borne in mind that the solution may “sag” when it dries, so it is necessary to rub the seams twice or thrice.
The places where the tiles adjoin the wall are sealed with silicone sealant. This is an additional protection against water leakage and the appearance of fungus.
To process 3 sq. m floor with your own hands, it will take about 20 minutes.
Finishing tiles
After the grout dries, you can start finishing the seams. But how do you know if the mixture has seized? This can be checked with a foam rubber sponge. It needs to be soaked clean water and draw along the seam line. If the solution is not frozen, it will follow the sponge. If the grout has set, it will stay in place.

Regardless of the nature of the room, the gaps must be re-treated with an antiseptic. Thus, the appearance of mold or fungus will be minimized. If we are talking about the bathroom, then there is a high probability that water will accumulate on the floor. To prevent liquid from penetrating into the seams, it is better to coat them with epoxy. This will be the last stage of do-it-yourself grouting work.
Next comes the turn of the tile. Using a foam sponge, wet cleaning is performed, which gives the work a finished look. This is done carefully, the sponge is driven in a circular motion. For better cleaning, before this, you can walk on the floor with a dry brush to sweep out the dust.
If glossy tiles are laid on the floor, then at the very end it is necessary to treat it with glass cleaner and polish it.